Showing posts with label In Our Homes. Show all posts

8.31.2011

Organization Station Fail

Remember this post from less than a month ago? Where I detailed how our pantry door went from blank to busy?

The end product looked like this....


Until a week later when things started falling....and then it looked like this....


Yeah. Those sticky squares were supposed to stick to the cork boards I purchased for $7 a pop.
 But instead, they adhered only to our pantry door. So each evening, upon arriving home from work, I was greeted with a Organization Mess Station. Luckily, Container Store has fabulous customer service and they agreed to return my cork boards (without a receipt) in exchange for store credit. 

I still wanted to keep the organization station going though...so I picked out something else. 
It's a super slim, magnetic board. I think it looks even better than the cork board!


A total fail turned...win!


8.23.2011

99% Off

Meg spotted this Caned Side Table on Joss & Main for the small price of $399.95. I got mine for 99% off that price at a garage sale, for only $3. And then I spruced it up with some paint and fabric.


$400 for a caned side table....really?

8.16.2011

Maury

The votes are in....it was a close race between the Longhorn and the Moose, but in the end....the Moose won out!

I purchased our Moose trophy from Cardboard Safari last week, and received him this past weekend. It was super simple to put together (seriously, a monkey could do it). Here are a couple of in-progress shots....


This is Megan "helping" from the couch.


Look at that enthusiastic thumbs up. Couldn't have done it without her :)


And here is the finished product up in the nursery 
(ignore all the crap in the crib - it's a work in progress :)).


Jeff and I are discussing what we will name the Moose. Cardboard Safari's official name for the guy is Fred.


...but we think Maury is a better fit.

8.09.2011

Couldn't resist...

I loved my other cabinet door upgrade so much that I couldn't resist the urge to duplicate the wonderful-ness on the other cabinet door. I went out and bought the shelf last night and installed it!


Sometimes it's the small things

This post is going to be very un-inspired and lame. However, I am getting such a kick out of this quick project that we (Megan & I) recently finished that I wanted to share.


See that white wire shelf attached to the cabinet door? That's new! Previous to owning that awesome shelf, Jeff and I had our cleaning products stored shoved in the under-the-sink-cabinet. In our 1950's home, space is a hot commodity and those bottles were taking up precious space. Adding this $3 wire shelf (from Container Store) helped us expand our storage area and helped us keep the most used items readily available. I like the shelf so much, I am considering adding a second one to the other door.

This project took about 5 minutes from start to finish.
Again, it's not very exciting, pretty or inspired.....but like I said, sometimes it's the small things that make a big difference!

8.05.2011

Organization Station

We added this small shelf in the kitchen nook earlier this year. 
Problem is, it usually doesn't look like this :)


On any given day, you will find the following items stacked up on this shelf: magazines, mail, coupons, recipes, more mail, bills and even more mail. When the mood strikes I often clean off the shelf by clipping the above mentioned items onto the fridge with magnets (which also annoys the hell out of me, but is better than it being stacked on the shelf).

So, in an attempt to wrangle all our lose ends into one space and actually make the shelf usuable and our fridge pretty, clean and clear, I created a Kitchen Organization Station.

No surprise, I headed to Pinterest for inspiration to see what other people had done.  Here were some of my favs.


The pantry door seemed like the perfect victim for the Organization Station upgrade. 
Here is the pantry door in our kitchen. Clean as a whistle, just asking for some personality.


After a quick trip to Container Store with Megan (love!) we were ready to tackle the project. We started by pre-drilling some holes, just to be sure that the wood didn't split on us.

For the record, Megan is much better with a drill than me. 
Amazing in fact....quick....efficient....comfortable. 
(I am not. I am awkward - as pictured below)


This next one is an embarrassing action shot, with my pregnant belly (nearly 33 weeks) in full view.


(I am trying to look tough)

Here is the pantry door now.


The white guy on top is like a file folder made of metal. You can slip magazines, bills, etc. right into the slot. It is magnetic, so I can also use the outside to post coupons, pictures and other "must-see" items. The red dots on the bottom left of the file folder (I should have taken a close-up) are also magnets. But this is the best part, they have hooks! So smart. I have taken to hanging my keys here. Love it!

The bottom four squares are all textured cork board. They were sold as individual squares and we thought buying two different colors and making a pattern might add a little interest.

I am still considering adding some chalkboard paint to the bottom of the door, but haven't decided whether or not to take that leap. Anyone out there used the chalkboard paint? Love it? Hate it? Please share your thoughts!

8.01.2011

New Dining Digs

Our dining area is small, and it's made even smaller due to the fact that it also serves as a hallway to the kitchen, basement, upstairs, bathroom, guest room & nursery (read: the rest of the house). Up until this point, Jeff and I have been using a hand-me-down table from my Grandparents house. It is a beautiful and unique table. It's rectangular (plus comes with a leaf) and makes pretty good use of our small space. It has served us well over the years, but we have always had our eyes open for something else. Ideally, we wanted something round, with a mid-century modern feel. 48 inches is the ideal size. Here are pictures I had pinned of tables I liked.....


All photos & links here


If we could have our pick of any table, we would want something like this table from Room & Board.


Believe it or not, that exact table is what we found at the Room & Board Outlet Center this weekend. However, we decided not to make a purchase. Neither of us could rationalize dropping $1000 for the table. Believe me, we both loved it,  and there was a moment of "should we do it?" but in the end we walked away empty handed. In a last minute turn of events, as we drove home, we decided to swing by a vintage shop we had visited about a year back, to see what they might have in stock. 

Retro Pete's in St. Paul stocks just what the name suggests, unique, retro furniture/art/decor. It is a treasure trove, and Pete is a super nice guy.  When we first walked in, we didn't really see anything that fit what we were looking for. Luckily, we struck up a conversation with Pete (the owner) and he said that he thought he had what we wanted, but it was upstairs in the overflow area. 

A short twenty minutes later, after a hot & sweaty transition to the car, we were headed home with a Conant Ball 44 inch round, mid century dining table :)!! Best part is that we got the table for $225. There is a scratch on the top and a couple of water rings, but you know me...I like a challenge and intend to bring this table back into it's prime!

Here is the new table in our dining room. 


Strikingly similar to the R&B table, don't you think? It's taking a little time to get used to having a new table in the space. What do you guys think!?

6.29.2011

The project that will never end....

Sometimes I think that our posts give the impression that Meg and I are constantly working on projects, and that we start and finish projects over the course of a weekend or maybe even a day. I want to be honest with you guys....this is NOT always the case.

For example: do you guys remember this post? You know the one about my stenciling project....the one from April 5th. Several of you had kind encouraging words about that post, even mentioning that you couldn't wait to see the finished project.

Well...you might have to wait awhile, because.....Yep....I am STILL working on that project. It's like the project that will never end. To be honest, I have more or less abandoned the project and have taken a total hiatus from working on it, because I'm tired of it and it takes WAY longer to stencil than I thought. And I got annoyed.

Some of you that have seen the wall in-progress in person and have mentioned that you like the "un-finished" look of it....so many in fact that I have considered leaving it as is. But I think Jeff would kill me if I left it like this....So, here is my commitment, in writing to the blogosphere. I will finished this damn project, before the end of June July. Maybe :)


6.23.2011

More Original Art

I mentioned a little while back that Jeff and I are trying to bring more original art into our homes. We might not have the bank-roll to buy the expensive stuff, but we DO have the tenacity to find great stuff that doesn't cost an arm and a leg.

The other weekend we made our way to Northeast Minneapolis for the Art-A-Whirl Studio Tour. I totally regret not bringing my camera, as there was some absolutely amazing artwork.

One of our first stops was Art Crank. My husband is an avid biker and spotted this studio on one of his biking websites. They had tons of really great biking related posters that were both nice to look at and clever. We ended up purchasing a poster from artist Adam Turnman. If you live in the twin cities area, or live elsewhere and originate from the TC, you should definitely check out his artwork. There are so many familiar landmarks in his screenprints. We love the bright colors and the memories that come to mind everytime we look at our print.


sorry about the glare...

One of the other studios that we just happened upon was Old Tom Foolery. The company is a husband and wife team, based in Minneapolis. They have absolutely hilarious greeting cards. I don't know them, but based on their cards....I want to be their friends. You have got to check out there site.  I'm pretty sure we will be getting some Christmas cards from them this year.

Also, given my current pregnant condition, I found these cards especially hilarious. You might find them offensive....I find them really, really, funny!

6.09.2011

Semi Pretty Laundry

Look! I got a shiney new washer and dryer set! The washer & dryer themselves are lovely. I can't wait to start doing some major laundry!


The reason I say semi-pretty is that we still have these ugly floors.


One step at a time! :)

6.06.2011

Kitchen Upgrade - Final Chapter

You've seen us upgrade our kitchen bit by bit in phase 1, part 2 and part 3 (notice how I changed from phases to parts....no reason why...just forgot).

Well, we have come to the final installment of our kitchen upgrades. We painted Memorial Day Weekend and we are thrilled with the results.

The previous color was a two tone green. Two walls were painted a sage green and two walls were painted a dark hunter green.


You can kinda of see the light green in this picture. It's very grey-ish, but still green.


Here is the dark green. Not subtle at all.

We did your usual steps for painting, cleaning of the walls, followed by taping. Then we headed to the store to purchase our paint. I had picked out a Benjamin Moore color, but didn't want the BM price tag, so I picked out an alternate. Which saved me about $30.  We ended up picking Ace brand Wisp of Smoke.

Here are the results.


It is almost white. I would call it the lighted gray possible. Just "not white" enough to contrast with our appliances. The color really brightens up the space and surprisingly, makes me like our honey colored cabinets more. I also think the color rocks with our tile backsplash. Yeah!

Did any of you tackle any projects this MDW?

4.06.2011

Nursery Inspiration

Now that I am 15 weeks along I have been starting to check out glossies and blogs for nursey inspiration. There is a lot out there! We don't know what we are having yet, but we are planning to find out.

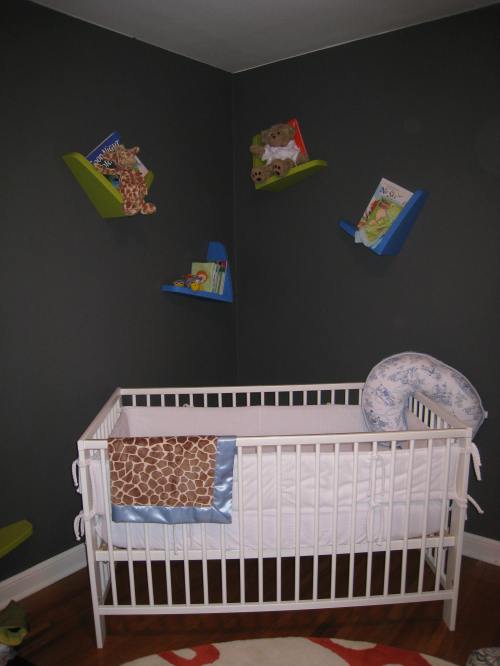
My plan, regardless of what we are having, is to keep things fairly gender neutral. The room is already painted an inky blue and the paint we used is low voc, so we aren't planning to paint again. Here are some of my favorites thus far....

If BP is a boy


Image via All Bower Power - click here for more info

baby boy nursery ideas with great baby room colors.PNG


Lurv the dresser/changing table in this pic. Image and details here.

blog & belly 016
Image via BloomingDesign

LOVE the color of the room (it's super similar to the color we already have). 
The crisp white and punches of bright colors is exactly what I want


Images via Spearmint Baby

The grey is really nice, and the natural wood accents are manly. I like!


There is definitely a theme going on here. Blue/Gray walls, white furniture, wood/natural accents.
 I guess it's a good thing that I know what I like.


If BP is a girl


This is a mood board, put together by Collecting Lovely. I had to include it, since the color scheme is spot on! Plus, the lamp that is included is SO similar to the one I got from Habitat in England this past November. I am generally not a big fan of pink, but interestingly, I really like the combination of pink with the moody/inky blue.

Image via Team Southards

Can this person read my mind? This is EXACTLY what I am thinking. 
Plus she completed a lot of projects on the cheap. Perfect!


Images via www.shandrophoto.com
Nursery and Concept from A Modern Proposal.

The bright yellow is so fun. I like how the room is so light filled. The subtle pops of teal are genius. 
If I hadn't already painted, I would be going shopping for yellow today!


Images and Ideas via Live the Fancy Life

I love every single detail in this room. I know this one was meant for a boy, but I sincerely think these colors would totally work in a girls room as well. I am dying over the paper lantern cluster. LOVE!


More to come in May, once we know what we are having! :)